Thursday, December 31, 2009

Goodbye 2009! Favorite Recipes of '09:

2009 has definitely been an interesting year for us!  All in one year I started a new job, realized that I hated that job and didn't want to work in accounting or finance in general anymore, quit that job, and started a graduate program to become an elementary school teacher.  I never would have predicted that I would make such a drastic change, but I'm so glad that I'm doing this now.  Kevin's had some big changes in his career too - he left UBS and financial services behind to start a new career in sales at Infor, which he is really liking so far.  I think things are changing for the best, and I hope that 2010 will be a great year :)

I have only been blogging for the past 3 months or so and only have about 50 posts to choose from, but I wanted to look back and pick a few of my favorite recipes that I blogged about in 2009.  In no particular order, here are my top 9 from '09:


Whenever I ask Kevin to give me suggestions for what he wants for dinner, Chicken, Noodles & Dumplings are always at the top of his list.  This is the perfect comfort meal for the wintertime, and has such a great flavor.  It's so simple, but there's something about this meal that keeps me making it over and over again.


This baked goat cheese is one of the easiest appetizers that I make, but it's so good that we could eat it once a week.  Goat cheese and marinara just go so perfectly together.


This salad (Lana's Salad) is now my go-to salad for special occasions.  The dressing is SO good.  My Aunt Lana brought this to many family gatherings growing up, and I can see why everyone always requested it.


This Shrimp Scampi Linguini recipe was adapted from one of my favorite food network stars - Ina Garten.  This recipe is easy enough to make for a weeknight meal, but it's also nice enough to make when you have company over.  I've made this many times, and it's always great!


Even though I just posted this recipe today, it was so good that I wanted to include it in this post.  If you love bananas like we do, you will love the combination of waffles and bananas foster.  This is the perfect breakfast for a special occasion.


This beef tenderloin is a great meal to make for a special occasion or when hosting guests for dinner.  It's one of the pricier meals I've made this year, but totally worth it.  The marinade gives the beef tenderloin a great flavor, and ours turned out really tender and juicy.


This apple bread pudding recipe is to die for!  If you're a bread pudding fan you should try this one out.  The flavor is so good, and the whiskey sauce on top really makes it amazing.  It's super easy to make too.


My mom and I made this Cioppino (Italian Seafood Stew) in November, and I've been thinking about that flavorful broth ever since!  All of the different seafood can get pricey so I'll probably only make this for special occasions, but this was the perfect meal for me now that I'm a shellfish lover.


This toasted ravioli recipes is one of my favorite appetizers.  There's something about the crispy coating that goes perfectly with the pasta and cheesy filling, dipped in warm marinara, of course.  I just love toasted ravioli in general so I'm glad that it's so easy for me to make at home.


So those were my 9 favorites from '09, and since 2010 will be my first full year of blogging, I'm sure that there will be some great new recipes to come!  Before I sign off for the year, here are 10 things that I know for sure that I want to try to make in 2010:

1.  Ebelskivers - I just got a great new ebelskiver pan from my mother-in-law for Christmas, and I can't wait to try it out!

2.  Homemade Eggrolls - I love Chinese food, and I've wanted to make homemade eggrolls for awhile now.

3.  Individual Beef Wellingtons - I've seen a few blog posts on beef wellington lately, and they look really good for a nice dinner.

4.  Risotto - For some reason, I've never actually made risotto at home.  I would love to make a seafood risotto.

5.  Buffalo Chicken Dip - I've heard so many bloggers talk about this "crack dip," but I'm finally going to make it myself in 2010 to see what all of the fuss is about :)

6.  Crab Rangoon - Another chinese recipe that I want to try, and this one should be pretty easy.

7.  Bread - I've made homemade bread a couple of time, but in 2010 I want to try making different kinds of bread from scratch.

8.  Homemade Ice Cream - I have the ice cream attachment for my kitchenaid mixer, but when I've tried a couple recipes in the past, they were just okay so this year I want to make some blog worthy homemade ice cream.

9.  Lobster Bisque - Kevin and I love love love lobster bisque, but I've never made it at home.

10.  Veal Saltimbocca - One of my restaurant favorites, but I want to perfect it at home!

Bananas Foster Waffles - Our Christmas Morning Breakfast


This year, we spent the week before Christmas with my parents and my sister on a Caribbean cruise aboard the Norwegian Pearl.  Every morning, we would all sit on the back patio of the pool deck on the ship and enjoy eating breakfast outside.  On one of the mornings, both Kevin and I had waffles with a banana topping that reminded me of bananas foster (which is one of our favorite desserts!).  The banana topping went really well with the waffles so I decided to make this for our Christmas morning breakfast. 

To go along with the waffles, we made mimosas (I even squeezed fresh oranges for the orange juice and we also had some fresh pureed strawberries to add a twist on the mimosas).


And of course, we had to have some bacon to go with our breakfast.


But getting back to the delicious bananas foster waffles that I made.....I adapted this waffle recipe from http://www.allrecipes.com/, and I used Paula Deen's bananas foster recipe for the topping (which I have used with much success in the past for dessert, which I serve over some vanilla ice cream).

Ingredients:

Waffles-
2 cups all-purpose flour
1 teaspoon salt
4 teaspoons baking powder
4 tablespoons white sugar
2 eggs
1 1/2 cups warm milk
1/2 cup butter, melted
2 teaspoons vanilla extract

Bananas Foster Topping-
1 stick of butter
1/2 cup brown sugar
4 bananas, sliced into 1 inch slices
1/4 cup dark rum (I used Myer's dark rum)

Directions:

For the Waffles-

In a large bowl, mix together flour, salt, baking powder and sugar; set aside. Preheat waffle iron to desired temperature.

In a separate bowl, beat the eggs. Stir in the milk, butter and vanilla. Pour the milk mixture into the flour mixture; beat until blended.

Ladle the batter into a preheated greased waffle iron. Cook the waffles until golden and crisp. Keep waffles warm in a 200 degree oven until you are ready to serve.
 
For the Bananas Foster Topping-
 
Melt butter in a large skillet. Add brown sugar and stir together. Add the bananas and cook until caramelized over medium-high heat. Pour in the rum and catch a flame off of the gas stove or a long lighter. Stand back when ignited and flambe. Be careful; a flame will shoot up above the pan. Let flame die down. Serve over your waffles, and garnish with a little whipped cream.
 
These were soooooo good!  They were perfect for a special occasion breakfast.

Tuesday, December 29, 2009

Toffee


I've been wanting to make toffee for awhile now, and I finally bought myself a candy thermometer and made a batch of toffee to go along with the oreo truffles I made to bring to Christmas Eve dinner.  I didn't realize how easy it was to make toffee....and only 5 ingredients!  I was pretty happy with my first attempt at making candy, and I thought these went good with the truffles.....although these are pure butter and sugar so I wish I didn't have all of these leftovers :)  I adapted this recipe that I found on http://www.allrecipes.com/.  Next time, I may do a layer of white chocolate on the bottom and semisweet chocolate on top.

Ingredients:

1 pound butter (4 sticks)
1 cup white sugar
1 cup packed brown sugar
1 cup chopped walnuts
2 cups semisweet chocolate chips (I used a little more than 2 cups)

Directions:

1.  In a heavy saucepan, combine butter, white sugar, and brown sugar. Cook over medium heat, stirring constantly until mixture boils (I just kept stirring with a whisk until it boiled, and then I didn't stir anymore after that). Boil to brittle stage, 300 degrees F (150 degrees C) without stirring. Remove from heat (I actually removed from the heat once the mixture reached 295 degrees).

2.  Pour hot sugar/butter mixture onto a rimmed sheet pan that's been greased with butter (or pam).  Sprinkle the chocolate chips on top and let it sit for 2-3 minutes so that the chocolate melts.  Using a rubber spatula, spread out the melted chocolate and sprinkle walnuts on top and press into chocolate.  Let the mixture cool and break it into pieces before serving.


Monday, December 28, 2009

Caribbean Jerk Chicken Sandwiches


Kevin and I recently got back from a Caribbean cruise that we went on with my parents and my sister.  It was a great vacation, and it was hard to come back to freezing cold weather afterwards. Last week, we decided to use some of the Caribbean jerk seasoning that we bought on our vacation to make chicken sandwiches.  There was a snow storm that night so I decided to grill up the chicken on our indoor grill, and they turned out very good.  This was a good weeknight meal and the jerk seasoning added lots of spice and flavor to the chicken breasts.  Of course we had to top the sandwiches with some melted cheese! 

Ingredients:

4 boneless skinless chicken breasts halves, butterflied and pounded out a little bit
4 sandwich buns
salt, pepper, and Caribbean jerk seasoning, to taste
4 provolone cheese slices
1 medium yellow or white onion, sliced
1 red bell pepper, sliced into strips
2 tablespoons butter

Directions:

Season chicken breasts liberally with salt, pepper, and Caribbean jerk seasoning.  Grill either outside or on an indoor grill until chicken is cooked completely through (on my indoor grill it took about 7-8 minutes).

Meanwhile, saute the onions and red bell peppers in butter over medium heat until softened (about 8 minutes). 

During the last couple minutes of grilling the chicken, put some of the onion and bell pepper mixture on top of each sandwich followed by a slice of cheese.  Cook until the cheese is melted, stick them on buns, and enjoy!

Fruit Salad


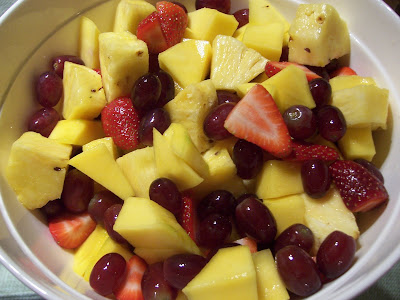
I've found myself eating less fruit now that it's wintertime, so I made an effort to buy a lot of fruit when I went to the grocery store last week.  A few days later, I threw some of it together for a quick, light side dish to go with the Caribbean jerk chicken sandwiches we were having for dinner. 

For this fruit salad we used a whole pineapple, 2 mangos, half a carton of strawberries, and some red grapes.  Fresh and delicious!

Tuesday, December 22, 2009

Pizza Cups


I took my first foods class when I was in middle school, and there is one recipe that I learned in that class that I remember and still make to this day.....pizza cups (it's a little hard to tell from the picture above, but these are little deep dish pizzas baked in a muffin pan)!  After learning to make these, I would always volunteer to make dinner for my family, and eventually they all got super sick of me making pizza cups every single time :)  Regardless, I love these little pizza cups and still make them about once a month on a weekday because they only have a few ingredients and always taste great (I also bet kids would love them)!  The recipe below makes 8 pizza cups (muffin sized) which feeds 2 hungry adults, but a lot of times I'll make a double batch so that I can use a whole pound of ground beef and have leftovers for lunches.

Ingredients:

1/2 pound ground beef
1 cup tomato sauce (we usually use store bought unless I have some leftover sauce in the freezer)
1/2 cup yellow or white onion, diced (optional)
1 1/2 teaspoons minced garlic (optional)
1 can refrigerated biscuits - 8 biscuits (we usually use the pillsbury buttermilk biscuits)
1 cup shredded mozzarella cheese
salt, pepper, and italian seasoning, to taste
pam or olive oil to grease the muffin pan

Directions:

1.  In a large skillet, add ground beef, onions, and garlic.  Heat over medium heat until beef is browned through and onions are softened.  Remove from heat, and drain excess grease.  Stir tomato sauce into the beef mixture and season with salt, pepper, and italian seasoning to taste.

2.  Meanwhile, take each refrigerated biscuit, and flatten with your hands and stretch out a bit.  Press each biscuit on the bottom and up the sides of a greased muffin tin (so the biscuit will form a little cup and come all the way up the side of the tin).

3.  Put a pinch of cheese in each biscuit cup.  Then spoon the beef and tomato sauce mixture to fill each cup.  Sprinkle the top with more shredded cheese.

4.  Bake at 350 degrees until biscuit cup edges are golden and cheese is melted (this usually takes me between 18-22 minutes).  If you love pepper like I do, put a little fresh cracked pepper on top of the pizza cups.  Let pizza cups cool for a few minutes and serve.

Friday, December 18, 2009

Coconut Chicken Strips


I made coconut shrimp a few weeks back for a thanksgiving appetizer, and I loved the flavor and the dipping sauce, so I decided to use the same recipe and concept to make coconut chicken strips.  As a kid, chicken tenders were one of my favorite meals, and it was nice to find a new twist on chicken tenders that I liked.  The sauce was very good with the coconut chicken tenders, although next time I'll also have some honey mustard for dipping just because I love chicken tenders and honey mustard together.

Ingredients:

Peanut oil (or you could also use canola or vegetable oil), for frying
1 pound boneless, skinless chicken breast, cut into strips
1 cup panko bread crumbs
1 cup shredded sweetened coconut
3 large eggs
splash of milk
Salt and freshly ground black pepper
1 cup all-purpose flour
1/2 tablespoon onion powder
1/2 tablespoon granulated garlic powder

Zesty Dipping Sauce-
1 (6-ounce) jar orange marmalade
1/4 cup sweet Asian chili sauce
1 lime, juiced

Directions:

Make your dipping sauce just by mixing the ingredients together in a small bowl, and store it in the refrigerator until you're ready to eat.

Heat oil (enough to have a depth of about 1/2 of an inch) in a large skillet over medium to medium high heat.

Season your chicken strips with salt and pepper and set aside.

In medium bowl mix together panko and coconut (I first put the coconut in the food processor and pulsed a few times to get the flakes a little smaller so that they would stick better to the chicken). In another medium bowl beat eggs with a splash of milk. In a third bowl mix flour, onion and garlic powder together. Dredge chicken in flour, then eggs, then the bread crumbs.

Place chicken in the large skillet and fry, in batches, until crisp and golden brown and cooked through; 7 to 10 minutes.  Drain on a paper towel-lined sheet tray. Keep warm in a 200 degree oven until ready to serve.  Serve hot with Zesty Dipping Sauce on the side.

Wednesday, December 16, 2009

Sweet and Sticky Chicken Legs


I absolutely love bone-in chicken.  A lot of people I know would much rather cook with boneless, skinless chicken breast (which I like too), but I just think that bone-in chicken is so much more flavorful and juicy.  I also prefer the dark meat so I often will roast up bone-in chicken drumsticks and thighs.  For me, boneless skinless chicken breast can get dry baking in the oven (which is why I almost always bread and pan fry boneless chicken breasts instead of just baking them), and the color just isn't as appealing as roasted bone-in chicken with the skin on. 

Anyway, I was looking through one of Giada's cookbooks (Giada's Kitchen:  New Italian Favorites) and spotted this recipe using bone-in drumsticks.  It ended up juicy and sweet (and a little messy), and I served it with a side of cous cous.  I will be making this one again sometime, except next time I will probably use both drumsticks and thighs.

Ingredients:

1/2 cup balsamic vinegar
1/2 cup honey
1/2 cup light brown sugar, packed
1/2 cup soy sauce
5 fresh rosemary sprigs
5 garlic cloves, halved
10 to 12 chicken drumsticks
2 tablespoons toasted sesame seeds
1/4 cup chopped fresh flat-leaf parsley leaves

Directions:

Combine the balsamic vinegar, honey, brown sugar, soy sauce, rosemary sprigs and garlic cloves in a large, resealable plastic bag. Shake and squeeze the contents of the bag to dissolve the honey and the brown sugar. Add the chicken drumsticks to the bag and seal, squeezing out as much air from the bag as possible. Marinate in the refrigerator for 2 hours.

Preheat the oven to 450 degrees. Line a rimmed baking sheet with aluminum foil.

Remove the chicken drumsticks from the bag, reserving the marinade, and arrange them on the prepared baking sheet. Bake until the skin is caramelized and very dark in spots, 30 to 35 minutes.

Meanwhile, place the marinade in a small saucepan. Bring the marinade to a boil, then reduce the heat to a simmer and cook over low heat until thick, about 15 minutes.

Use a pastry brush to brush some of the cooked marinade on the cooked chicken. Place the chicken on a serving platter. Sprinkle with the sesame seeds and the chopped parsley.

Monday, December 14, 2009

Meatball Subs


This isn't really a recipe, but I just love meatball subs!  Whenever I make spaghetti and meatballs, I always make sure I'll have some extra meatballs to freeze and use later.  It's so easy to pull together for a quick, weeknight meal, and it's perfect in the winter when you're craving a hot sandwich. 

For these sandwiches, I just bought some sub rolls and stuck them under the broiler with some provolone cheese until the cheese was all melted and the bread was toasted.  Then I added some heated up meatballs with a little tomato sauce and you have a 10 minute meal :)

Saturday, December 12, 2009

Shrimp Fra Diavolo with Angel Hair Pasta


I absolutely love shrimp and pasta together, and this is one of the healthiest pasta dishes that I make.  I found this recipe a couple of years ago and have been making it ever since.  It's spicy and very flavorful, and I usually make this at least once a month.  It's also pretty quick to pull together (less than 30 minutes) so it makes a great weeknight meal, but it's also good enough that I would serve this when we had company over.  I got this recipe from Giada De Laurentiis, and have changed it just a little bit.

Ingredients:

1 pound large shrimp, peeled, deveined (I also take the tails off, but that's just my preference)
1 teaspoon salt, plus additional as needed
1 teaspoon dried crushed red pepper flakes (this makes it pretty spicy so I wouldn't add more than this)
3 tablespoons olive oil
2 tablespoons butter
1 medium onion, sliced
2 (14 1/2-ounce) can diced tomatoes (if you like your pasta really saucy you could even use 3 cans)
1 cup dry white wine (I use Savignon Blanc)
4 teaspoons minced garlic
1/2 teaspoon dried italian seasoning
3 tablespoon chopped fresh Italian parsley leaves
1 cup of grated parmesan cheese
fresh cracked pepper
1 pound angel hair pasta

Directions:

Toss the shrimp in a medium bowl with 1 teaspoon of salt and red pepper flakes. Heat the olive oil and butter in a heavy large skillet over medium-high heat. Add the shrimp and saute for about a minute, toss, and continue cooking until just cooked through, about 1 to 2 minutes. Transfer the shrimp to a large plate; set aside.

Add the onion to the same skillet, adding extra olive oil to the pan, if necessary, and saute until translucent, about 5 minutes. Add the tomatoes with their juices, wine, garlic, and italian seasoning. Simmer until the sauce thickens slightly, about 10-15 minutes.  Taste the sauce, and add any additional seasonings needed.

Meanwhile, cook the angel hair pasta in a large stockpot according to the package directions, drain, and return to the large pot.  Add the the shrimp and any accumulated juices to the large pot.  Add the tomato sauce mixture, the parsley, and the parmesan cheese, and stir together.  Serve immediately with some fresh cracked pepper and parmesan cheese if desired.

Thursday, December 10, 2009

Toasted Ravioli


Growing up, I would love when I found toasted ravioli on the menu of a restaurant we were at, and I would always order it as my meal.  For some reason, I don't really eat ravioli at all unless it's toasted (fried) ravioli.  I just love the crunch mixed in with all of the yummy cheese in the ravioli, dipped in a warm marinara sauce.  This meal or appetizer can be somewhat time consuming since you have to bread each individual ravioli so I like to use the bigger ravioli that you find in the frozen section instead of those smaller ravioli that are in the refrigerator section.  I served these in some tomato sauce that I had in the freezer that was leftover from when I made spaghetti and meatballs.  Delicious!

Ingredients:

1/2 of a (25 oz.) package of frozen cheese ravioli, thawed
1 cup flour
3 eggs
3 tablespoons milk
1 cup italian bread crumbs
salt and pepper
oil (I use vegetable or canola oil)
grated parmesan cheese (optional)
marinara sauce, for serving

Directions:

1.  Add flour to a ziploc bag and season with salt and pepper.  In a shallow bowl, beat up eggs with milk.  In another shallow bowl add breadcrumbs and season with salt and pepper.

2.  First, shake up ravioli in flour bag to coat, then dip in egg mixture.  Last, coat with breadcrumbs and set aside until all ravioli are coated.

3.  Pour oil in a large skillet to a depth of about a half of an inch, and heat over medium heat.  In batches, fry ravioli for about a minute on each side, or until golden brown.  Drain ravioli on paper towels and sprinkle with a little parmesan cheese, if desired.

4.  Serve with some warm marinara sauce for dipping.

Tuesday, December 8, 2009

Beef Tenderloin


This turned out to be a really good main dish to make when having people over.  Since I haven't ever made beef tenderloin, I was a little nervous about how it would turn out since we had Kevin's parents over and it's a pretty expensive cut of meat to mess up, but it turned out good.  I would definitely make this again for a nice dinner.  Our meal was made up of crab dip for an appetizer, beef tenderloin, twice baked potatoes, salad, dinner rolls, and an apple tart that Kevin's mom brought for dessert.  Everything was REALLY good, and Kevin and I used the leftover beef tenderloin to make steak sandwiches the next day.  I made a mustard sauce to go with the beef tenderloin, but it was so juicy that it actually didn't really need a sauce.  My mom gave me this recipe that my Aunt Kathy gave her, and the marinade had a great flavor.

Ingredients:

3-4 lb. beef tenderloin, trimmed and silver skin removed (I actually cheated and bought the already trimmed and prepared tenderloin from costco, but it is cheaper to do it yourself)
4 or 5 slices of bacon
fresh cracked pepper

Marinade-
3/4 cup unsweetened pineapple juice
1/2 cup steak sauce
1/3 cup worstershire sauce
1/3 cup port wine
1/4 cup lemon juice
2 teaspoons seasoned salt
1 teaspoon fresh cracked pepper
1 teaspoon lemon pepper seasoning
1 teaspoon dry mustard

Directions:

1.  Mix marinade ingredients together in a large, ziploc bag.  Add beef tenderloin and marinate for about 8 hours (you could also do this overnight).

2.  Preheat oven to 425 degrees.

3.  Place beef tenderloin on a roasting rack with marinade in the bottom of the pan.  Rub cracked pepper on the tenderloin and top with a few slices of uncooked bacon.

4.  Bake (uncovered) for about 35-45 minutes or until meat reaches your desired temperature.  Baste with the marinade twice during cooking.  Remove bacon and let stand for about 15 minutes before carving.  Slice into 1/2 inch slices and serve.

We wanted our beef tenderloin to be medium rare so we took it out of the oven around 123 degrees and then by the time we let it rest and sliced it, it was about 128 degrees.

Twice Baked Potatoes


I love serving twice baked potatoes with any steak meal I make, and I think they're perfect for having company over because you can make them in the morning (or even the night before) and then all you have to do is finish them off in the oven when you're ready.  When we're having people over, I don't like to make recipes that require me to do to much right before I serve them because it's too stressful to be messing around too much in the kitchen when people are over....I'd much rather do all of my prep in the morning and only have to worry about putting stuff in the oven, taking stuff out of the oven, tossing the salad with the dressing, etc.  Anyways, I've been making these potatoes for a long time, and they will continue to be one of my go-to side dishes.  Below is how I make mine, but you can definitely adjust the ingredients to your tastes.

Ingredients:

6 large baking potatoes
1 stick of butter
1 1/2 cups sour cream
2 cups shredded cheddar cheese
2-3 tablespoons chives, minced up
salt and pepper, to taste

Directions:

1.  Preheat your oven to 450 degrees.  Poke some holes in each potato with a fork, and bake for about an hour to an hour and 15 minutes, or until soft (if you're using small potatoes, it might be closer to 45 minutes).

2.  Cut enough of the skin off the top of each potato so that you can scoop the potato out of the skin.  Scoop out each potato and put into a large mixing bowl.

3.  Add butter and sour cream, and mash together.  Stir in the shredded cheese, chives, and salt and pepper to taste.  I think that the seasonings can really make or break your potato - if you don't add enough salt, these will taste really bland, but be careful not too add too much.  I usually start with a little, taste, and slowly keep adding more salt and pepper (and tasting) until it tastes perfect.

4.  Fill the potato skins with the mixture, and bake at 375 degrees for about 25 to 30 minutes, or until heated through.

Hot Crab Dip


It's taken me a little bit to get these next few recipes posted because I've been way too obsessed with reading the Twilight Saga over the past few days, but we had Kevin's parents over for dinner last weekend, and I must say it turned out really good!  I wanted to try a few recipes that I thought would be "company worthy," and I'm happy to say that the recipes from this dinner are definitely keepers :)  To start out with, I made a hot crab dip for an appetizer.  I hate it when I try a crab dip and it has that canned crab fishy taste, so I decided to get a couple of king crab legs to use in this dip.  King crab is my favorite because it's so sweet and doesn't taste "fishy" at all, and it tasted really good in this dip.  I used this recipe from http://www.allrecipes.com/.  This is a good appetizer for company because you can prepare the dip in the morning and then pop it in the oven right before you company is arriving.

Ingredients:

1 (8 ounce) package cream cheese, softened
1/2 cup sour cream
2 tablespoons mayonnaise
1 1/2 tablespoons lemon juice
zest of 1 lemon
2 teaspoons Worcestershire sauce
1 teaspoon dry mustard
garlic powder to taste (I used about a teaspoon)
1 cup shredded Cheddar cheese
3/4 pound fresh crabmeat (I used king crab - don't use canned!)
3 dashes hot sauce
Old Bay Seasoning to taste (I probably used about a tablespoon or maybe a little more)
crackers or toasted bread to serve

Directions:

1.Preheat oven to 325 degrees F (165 degrees C). Lightly grease a 1 quart baking dish.

2.In a medium bowl, mix cream cheese, sour cream, mayonnaise, lemon juice and zest, Worcestershire sauce, dry mustard, garlic powder and cheddar cheese. Fold in crabmeat, hot sauce and Old Bay seasoning to taste.

3.Transfer the mixture to the prepared baking dish. Bake in the preheated oven 30 minutes, or until bubbly.  Serve the dip with toasted bread or crackers.

Thursday, December 3, 2009

Mussels Mariniere


Ever since my mom and I made Cioppino about a month ago, I've been wanting to do something similiar but just with mussels.  That broth was just soooo good that I thought it would be a good weeknight meal to do with just mussels so that I don't have to buy a ton of different seafood.  For some reason my grocery store hasn't been carrying mussels lately.....I asked the seafood guy and he said they've been having trouble with all of their mussel orders coming in because half of them are already dead by the time they get there.  I decided that I would have to make a run to Whole Foods.  I think Whole Foods has some amazing stuff, but it's just too expensive to do too much shopping there.  I ended up getting some really good mussels, but they cost more than double what my grocery store usually charges for them.....oh well, this dish was worth it! 

Trust me, if you like mussels you will love this :)  Make sure you have plenty of thick sliced bread to soak up all of the broth because the flavor is so good.  In terms of how many mussels you will need, I read somewhere that if you're serving mussels as the main course to plan for 1 lb per person, and if you're doing mussels for appetizers you should plan for 1/2 lb per person.  This time I made 2 lbs (although the seafood guy told me he threw in a few extra) and it was just a little more than we could eat.  Since mussels won't stay as leftovers, I may just get a pound and a half for the two of us next time....but then again sometimes it's good to play it safe with mussels in case you have to throw a bunch out (I hardly had to throw any out on this batch).  Enjoy!

Ingredients:

1 green bell pepper, finely diced
1 cup shallots, diced
1 bunch scallions, chopped
3 tablespoons minced garlic
salt, pepper, and italian seasoning to taste
3 cans italian flavored diced tomatoes
1 can beef broth
1 jar of clam juice
1 cup white wine (we used a Savignon Blanc)
2 lbs mussels, scrubbed and debearded (buy them the same day you're going to cook them)
Crusty bread to serve with your mussels

Directions:

Sautee onions, green peppers, shallots, scallions, and garlic until translucent. Season to taste with salt, pepper, and italian seasoning (be generous with your seasoning). Add the white wine and let cook down a bit.

In a large stockpot, heat up italian diced tomatoes, beef broth, and claim juice.  Transfer the sauteed onion and pepper mix to the stockpot and heat over medium heat for about 30 minutes or so. At this time taste the broth and season as needed.
Meanwhile, soak the mussels in cold water for about 20 minutes to remove any sand or dirt.  Throw out any mussels that don't close when you tap their shell.  

Add the mussels to the pot and cook until the shells open (about 10 minutes).  Discard any mussels that don't open and serve the mussels and broth w/ crusty bread.