Showing posts with label appetizers. Show all posts

Wednesday, April 20, 2011

Asian Lettuce Wraps


I have to admit that before I made these, I'd never actually eaten lettuce wraps.....a meal without carbs?!  How could that be???  I stumbled across this recipe on The Noble Pig blog and decided to give it a try since I've been trying to eat a little healthier lately.

I'm glad I gave this a try because it made a tasty, healthy meal for us.  I'll admit that I wouldn't have turned down some eggrolls or potstickers to go with this, but it was definitely filling on it's own and good for my waistline.  I also loved the presentation, and I think this would make a good appetizer when you're entertaining guests.  I will definitely be making these again :)

Ingredients:

1 Tablespoon vegetable oil
1 onion, chopped
2 cloves garlic, minced
1-1/2 pounds ground turkey or ground pork (I used a 1.25 lb. package of ground turkey)
1/2 cup chicken broth
2 Tablespoons hoisin sauce
2 Tablespoons teriyaki sauce
1 cup bean sprouts
2 carrots, shredded (about 1 cup)
24 large Boston or butter lettuce leaves (I used 1 head of butter lettuce....you could also use regular iceberg lettuce to cut the costs a little bit)
Soy sauce, for serving

Directions:

Warm oil in a large skillet over medium-high heat.  Add onion and saute until softened, about 3 minutes.  Add garlic, saute 1 minute longer.

Stir in turkey and cook, stirring until almost cooked through, about 5 minutes. Add broth and hoisin sauce. Cook, stirring and breaking up clumps of turkey, until turkey is cooked through and some of the liquid cooks down, 5 to 7 minutes.

Remove from heat and stir in teriyaki sauce, bean sprouts and carrots. (You should have about 6 cups of filling).

Either spoon about 1/4 cup of filling into center of each lettuce leaf, or serve like I did below so that each person can just make their own lettuce wraps.  Serve with soy sauce if desired.


Source:  The Noble Pig

Tuesday, April 5, 2011

Celebrating the 2010 Holidays


So I know that this post is a little bit overdue, but better late than never...right?  Do you like our beautiful Christmas tree in the above picture?  Anyway, Kevin and I spent last Christmas in Chicago with his family so this year we packed up and went to Kansas City for Christmas.  We of course drove the 8+ hour drive instead of flying so that we could bring our dog, Windy, with us :) 

I was excited because I love cooking and entertaining, and my mom let me take the lead on planning the Christmas Eve cocktail party with her side of the family.  I spent the day before prepping so that I didn't have to work too hard on Christmas Eve, and I have to say that everything turned out great, and we had a blast!  We served heavy appetizers, drinks, and dessert.  I'll post some of these recipes on the blog later on, but here's a look at what we had on the menu: 

First up - fruit salsa with cinnamon chips.....so good, and I will totally be making this again for future parties.


I also wanted a whole tray of bite sized appetizers that would be easy for people to just grab and eat.  Sorry about the bad picture quality below, but this tray featured the following appetizers:  The top plate had brie tartlets (half with a yummy grape mixture and half with apple butter), the middle plate was crabbies (love these, and they're so easy to make ahead of time), and the bottom plate was goat cheese tartlets (half with apple butter and half with marinara).


The next dish was my sister, Kristen's, appetizer:  Jalapeno Popper Dip.  I've made this one before but haven't blogged about it yet, but I will soon because it is so freaking good!  This one definitely went fast.


I wanted some kind of heavier appetizer so I decided to make some mini sandwich sliders.  I made a combination of ham and swiss sliders and roast beef and cheddar sliders.  This is another recipe that I will add to the blog soon because it is great for parties.  You might not think you need an actual recipe for these, but trust me....the sauce that they are brushed with totally make these sliders fantastic!  These are also great because you can prepare them ahead of time (which I did the night before) and just bake for about 10 minutes when you're ready to serve them.


What is a party without homemade chips and salsa?  I even took the time to fry up these tortilla chips myself because they are so much better than store bought!


Another yummy appetizer I made was loaded twice baked red potatoes.  Who can resist a mixture of potatoes, butter, sour cream, bacon, and cheese?


I think I make this spinach artichoke dip for almost every party I host because I'm obsessed with it.


Next up, hogs in a blanket!  Just like pigs in a blanket, but better :)


Of course, no cocktail party is complete without plenty of beer and wine :)


Plus some party punch for extra fun!


For dessert, I made mini eggnog cheesecakes.  I wish I had gotten a better picture of these, but oh well.  These were fantastic....I love doing individually portioned desserts like mini cheesecakes or cupcakes so that you don't have to cut out pieces for everyone.


I also made a few bite sized sweets, and my mom make some of my Grandma Jean's Italian cookies (which I somehow didn't get any pictures of).


Next up....Christmas Day!  We had a low key meal with my Grandma Nancy and Grandpa Frank.  We had our traditional Christmas Day meal, which is prime rib......yum!  Since I had done all the cooking for Christmas Eve, my mom and dad did all of the Christmas Day cooking.  We had au jus and a horseradish cream sauce to go with the prime rib.


One of our sides was twice baked potatoes (which is probably my favorite side dish of all times).


We also had Lana's Salad with the meal (which is my favorite holiday salad).


Of course you can't have a good meal without some buttery rolls to go on the side!


We also traditionally get a loaf of povitica, which is a sweet Croatian bread (really tasty, but I've never actually made one myself.....I hear it's quite a lot of work).


Afterwards, we spent a little time by the piano for a family sing-along :)  My dad's side of the family is very musically gifted (unfortunately, I didn't inherit the gift....).  My Grandpa can play just about every instrument I can think of (I even volunteered him to play the banjo in one of my elementary school musicals when I was a kid), and he is a fantastic guitar player.  He is well-known for playing the steel guitar, and he has even played at the Grand Ole Opry.....so neat!

My dad has always been able to play the piano by ear.  When we get him and my Grandpa to play together, it's always a lot of fun!  I have a short video clip of them playing a German song together that I wanted to share :)  PS....for the record, there is someone singing in the background of the video that doesn't quite know the words, but it is NOT me haha!


For New Year's Eve, we had king crab legs and twice baked potatoes.  If I had to pick a last meal, it would for sure be king crab legs!  When Kevin and I eat it for dinner, I always buy at least 2 pounds, but I usually buy 3 pounds to be safe because both of us love it so much.  SOOOOO GOOD!


We definitely had a great Christmas/New Years in 2010, and I'm looking forward to the next holiday season.  We will be in Chicago for Christmas Eve next year for a fun holiday celebration with Kevin's family, and then we're heading to Costa Rica from Christmas Day to New Years Day with my side of the family (thanks Mom and Dad)!  I'm super pumped about it :)

Thursday, March 31, 2011

Thai Mussels


If you love mussels like I do, you need to try this recipe now!  I love making mussels mariniere, but this time I wanted to find a recipe with a more unique flavor.  I found a recipe for thai mussels on allrecipes so I decided to give it a shot.  I had never cooked with thai red curry paste before so I was crossing my fingers that we would actually like the flavor of this....and we loved it!  Next time I buy mussels, I'm going to use this recipe again because I've been craving it for awhile.

When Kevin and I have mussels for a main course, I usually try to buy about 2 pounds of mussels....but since my grocery store still wasn't selling mussels, I had 2 options:  1 - Buy 2 pounds of mussels from Whole Foods for about $12....or 2 - Buy a 5 pound bag of mussels from Costco for around $10.  Well, I decided to go with the Costco option so we had way more mussels than we could eat, but we certainly ate as much as we could!  The recipe calls for 5 pounds, but you can definitely cut it down.  I would probably just cut the mussels down and keep the broth the same so that you have a ton of dipping sauce to soak up with some bread.

Ingredients:

5 pounds fresh mussels, scrubbed and debearded (rinse the mussels to clean, but don't soak in water or they might die before you cook them....I learned this the hard way awhile ago)
1/3 cup fresh lime juice (use real limes - much better than bottled juice!)
1 (13.5 ounce) can unsweetened coconut milk
1/3 cup dry white wine (I use savignon blanc, but use what you have on hand)
1 1/2 tablespoons Thai red curry paste (I probably used about 2 tablespoons)
1 1/2 tablespoons minced garlic
1 tablespoon Asian fish sauce
1 tablespoon white sugar
2 cups chopped fresh cilantro (1 used 1 small bunch....about a cup or a cup and a half)
loaf of crusty bread for dipping :)

Directions:

1. In a large stock pot, combine the lime juice, coconut milk, wine, curry paste, garlic, fish sauce and sugar. Stir to dissolve sugar and curry paste and bring to a boil over high heat. Boil for 2 minutes then add mussels. Cover and cook, stirring occasionally, until mussels are opened, 5 to 8 minutes.

2. Remove from the heat and discard any unopened mussels. Pour mussels and liquid into a serving dish and toss with cilantro.

Source:  Allrecipes

Wednesday, July 7, 2010

Crabbies


I've had my eye on Paula Deen's "crabbies" recipe for awhile.  I love both crab and cheese, and I saw her make these on one of her shows and I knew I wanted to try these out sometime.  Luckily, I had some frozen leftover king crab meat that I wanted to use up.  I had been planning on making seafood enchiladas with these leftovers, but then I remembered these crabbies, and they seemed really easy to make so I decided to make these instead for us to eat on the 4th of July as an appetizer to go with our smoked ribs.

Did I mention that king crab legs are probably my favorite food?  Yes, I like crab legs much better than lobster (although I definitely won't turn down a lobster dinner either!).  I love the sweetness and flavor of the crab meat, and I like the texture better than lobster or shrimp.  Whenever I buy king crab to make at home, I buy a pound and a half per person and make steamed crab legs with some garlic butter for dipping (I'm getting hungry just thinking about this right now).  Then, if we have any leftovers, I will get all of the meat out of the shells and freeze for later.

So I had the crab meat already, plus I had most of the other ingredients on hand, but when I went to the grocery store I needed to get a jar of Kraft Old English Cheese Spread that the recipe calls for.  I actually worked at Kraft Foods for over two and a half years (I used to work in finance and accounting), and I still remember exactly where they kept the Old English in the company store that I visited at least once each day to break up the work day, but I couldn't find it at my grocery store so instead I bought an 8 ounce container of Kaukauna cheese spread (I bought the sharp cheddar lite flavor) which worked out great. 

This recipe is courtesy of Paula Deen, but I did adjust it a bit so below is the recipe I made which turned out really yummy.  I will totally be making these again whenever I have some leftover king crab meat.  These are also great to keep in the freezer because all you have to do is pop them in the oven for 15 minutes and you'll have some great appetizers ready to go!

Ingredients:

1 1/2 cups chopped crab meat (Paula Deen's recipe says to use 8 ounces good white crabmeat)
1 (8 ounce) jar Kaukauna lite cheddar cheese spread (Paula's recommends a 5 oz. jar of Kraft Old English....I think any cheddar cheese spread would work with this recipe)
2 tablespoons mayonnaise
1/2 teaspoon garlic powder
1/2 teaspoon Old Bay Seasoning
1 stick of butter, softenened (did you expect any less butter in a Paula Deen recipe?)
Dash hot sauce or cayenne pepper (I used Frank's Red Hot Sauce)
12 english muffin halves, toasted (I just toasted these in my toaster for a few minutes before spreading the crab mixture on top)
Chopped Chives, for garnish (Paula uses Italian Parsley)

Directions:

Preheat oven to 425 degrees F.

In a large bowl, combine crab, cheese spread, mayonnaise, garlic powder, old bay seasoning, butter and hot sauce. Divide mixture evenly over bread rounds and spread. Stick these in the freezer for about 15 minutes to harden (you don't have to do this, but it makes them easier to cut into wedges).  Cut each round into quarters and place on a greased baking sheet (if freezing, do so at this point and add a few extra minutes when baking later on). Bake until topping is heated through and golden brown on top, about 10 to 15 minutes.

Sprinkle with chives. Serve hot.

Thursday, June 24, 2010

My First Caprese Salad of the Summer


In addition to the mint I'm growing this summer to make mojitos, I'm also growing 3 tomato plants.  I love summer tomatos - I usually use them to make caprese salads, bruschetta, or BLT sandwiches.  In recipes like these with so few ingredients and the tomatoes playing a star role, tomatoes bought in the winter just aren't the same. 

I was so excited when I realized I actually have a couple tomatoes that were turning red!  I picked two tomatoes and used them to make a caprese salad to go with our dinner tonight (I picked some fresh basil from my garden as well).  This isn't really a recipe, but I'll give you an idea of how I put this together and some tips. 

The #1 most important thing when making caprese is to use high quality ingredients - that's where my summer tomatoes come in.  Also, use good fresh mozzarella - That rubbery ball of fresh mozzarella wrapped in plastic won't taste as good as the higher quality mozzarella balls that float in the liquid (buffalo mozzarella is really good).  Use good EVOO and more importantly (in my opinion) use good balsamic vinegar.  I use this amazingly sweet 18-year balsamic vinegar that costs about twenty bucks a bottle - I had a taste of it a few years back, and now that I know what good balsamic tastes like, I just can't bring myself to stop buying this incredible, yet expensive stuff.

The second most important thing is to salt your tomatoes - if you don't salt them enough they will taste bland....don't be scared of salt!  Just add a little at a time and take a quick taste to see if it tastes right. 

Sometimes when I make a caprese salad, I use chunks of tomatoes and the little fresh mozzarella balls mixed together, but tonight I made a layered caprese salad.

Ingredients:

Ripe summer tomatoes - I used two
Fresh mozzarella - I used two of the mozzarella balls that came in a container of four
Basil (either whole leaves or chopped, whichever you prefer) - I probably used around 12 basil leaves
EVOO
Balsamic Vinegar
Salt & Pepper, to taste

Directions:

Slice each tomato into 3 or 4 slices, depending on how big they are, and slice the fresh mozzarella.  First, lay the tomato slices on a plate and salt the tomatoes to taste.  Layer the tomatoes with the mozzarella and basil.  Drizzle with EVOO and balsamic vinegar and season with salt and pepper, to taste. 

This is a perfect side dish for any summer meal :)

Wednesday, January 27, 2010

Pigs in a Blanket

I have always loved pigs in a blanket.  They're perfect bite-sized snacks, and they're super simple to make.  I made this for lunch on a Saturday, and they really hit the spot.  This isn't really a recipe, but here's how I make them:

Ingredients:

16 little smokies (I always buy the small package)
1 tube of pillsbury refrigerated crescents
2-3 slices of cheddar cheese (or any cheese works good)
ketchup, for dipping

Directions:

Preheat the oven to 375 degrees.

Cut each crescent triangle in half (you can also cut into thirds if you want less bread around each mini hot dog).  Place a small piece of cheese and a sausage on each crescent half and roll up.

Place on a greased cookie sheet and bake for 12-15 minutes, or until golden brown.

Tuesday, January 26, 2010

Homemade Salsa


I'm always looking for good homemade salsa recipes because homemade is soooooo much better than jarred salsa.  I decided to try out this recipe, from Annie's Eats (which by the way has so many great recipes and pictures!).  This salsa tasted really fresh and had quite a kick to it.  It made a ton so next time I'll probably half the recipe. 

Ingredients:

2 fresh jalapeno peppers, seeded and very coarsely chopped
4 teaspoons minced garlic
2 large vine-ripened tomatoes
1 (28 oz.) can diced tomatoes (I drained the liquid first)
2 tbsp. red wine vinegar
1 tbsp. cumin
1/2 sweet yellow onion, coarsely chopped
1/4 tsp. salt
1/2 tsp. ground cayenne pepper (this will be spicy so if you're not into spicy I would cut this down to 1/4 tsp.)
1/4 cup fresh cilantro
juice of one lime
 
Directions:
 
In the bowl of a food processor, combine the jalapenos and garlic. Process until finely chopped. Scrape down the sides of the bowl. Add all other ingredients to the food processor.
 
Pulse in very brief pulses until the vegetables have reached the size you desire (it only took me a few pulses to get everything combined). Transfer to an airtight container and refrigerate at least 2 hours before serving to allow the flavors to blend.

Thursday, January 21, 2010

Pork & Shrimp Egg Rolls

To go along with the orange chicken that I made for dinner, I decided to make some homemade egg rolls.  I've been wanting to make homemade egg rolls for awhile because the frozen kind just doesn't cut it for me.  Kevin loves egg rolls so I decided to go ahead and give it a try.

These turned out great!  I will say that it did take me quite a bit of time to make these since you have to roll up each invidual egg roll, (we ended up not eating dinner that night until 9ish instead of 8 like I had planned) but if you have the time it's worth it.  I think my first time making egg rolls was a success.  My only advice is to buy extra egg roll wrappers if you have never made egg rolls before because I tore quite a few of them in the beginning.  It took me awhile to get the rolling down (and you have to be very gentle otherwise the wrappers will tear open), but eventually I got the hang of it. 

I got this recipe from allrecipes.com, and it ended up making about 30ish big egg rolls so I fried up 8 and froze the rest for later (which I would suggest doing - this recipe is definitely a process so you want to make a bunch while you're doing the work so that you can eat these over several meals).

Ingredients:

1 (16 ounce) package wonton wrappers (I bought 2 packages of big eggroll wrappers.....each had 21 wrappers so I definitely needed 2 or else I would have had extra filling)
1 pound lean ground beef (I used ground pork instead)
1 pound shrimp - peeled, deveined and coarsely chopped
5 tablespoons soy sauce
3 tablespoons oyster sauce
1 pound bean sprouts
2 green onions
3 stalks celery, chopped
1 medium head cabbage, finely shredded (I just bought a bag of coleslaw mix to make it easier)
2 cloves garlic, minced
1 teaspoon MSG (I omitted, but I seasoned the filling with salt & pepper)
1 cup vegetable oil
Sweet and Sour Sauce, for serving

Directions:

1.  Place cabbage, bean sprouts, celery, and green onions in a large wok and stir fry over a high heat until vegetables cook down. Mix in shrimp, stir fry until cooked (I actually cooked the shrimp seperately to make sure I didn't overcook them.  Then I added into the mixture at the same time as the ground pork).

2.  In a large skillet, brown ground pork. Drain grease and add the meat to the vegetable and shrimp mixture. Continue to fry over a high heat; add oyster sauce, soy sauce, garlic, and salt & pepper. When well blended, remove mixture from heat.

3.  Place a tablespoon of the meat and seafood mixture (or more, depending on how large your egg roll wrappers are) into the center of each egg roll wrapper. Fold the wonton skin over to make a package of the meat mixture inside, and seal the skin closed by dipping your finger in a little water and pressing the ends together (the back of the egg roll wrapper package had instructions for how to roll the egg rolls up).  If you are freezing some of the eggrolls, freeze them on a baking sheet at this time and then move to a ziploc bag once they are frozen.

4.  Fry the wontons in 1/4 inch of vegetable oil until golden brown (if you are frying up the frozen ones, just go ahead and fry them from frozen and just fry a few extra minutes).  Serve with sweet and sour sauce.

Thursday, December 10, 2009

Toasted Ravioli


Growing up, I would love when I found toasted ravioli on the menu of a restaurant we were at, and I would always order it as my meal.  For some reason, I don't really eat ravioli at all unless it's toasted (fried) ravioli.  I just love the crunch mixed in with all of the yummy cheese in the ravioli, dipped in a warm marinara sauce.  This meal or appetizer can be somewhat time consuming since you have to bread each individual ravioli so I like to use the bigger ravioli that you find in the frozen section instead of those smaller ravioli that are in the refrigerator section.  I served these in some tomato sauce that I had in the freezer that was leftover from when I made spaghetti and meatballs.  Delicious!

Ingredients:

1/2 of a (25 oz.) package of frozen cheese ravioli, thawed
1 cup flour
3 eggs
3 tablespoons milk
1 cup italian bread crumbs
salt and pepper
oil (I use vegetable or canola oil)
grated parmesan cheese (optional)
marinara sauce, for serving

Directions:

1.  Add flour to a ziploc bag and season with salt and pepper.  In a shallow bowl, beat up eggs with milk.  In another shallow bowl add breadcrumbs and season with salt and pepper.

2.  First, shake up ravioli in flour bag to coat, then dip in egg mixture.  Last, coat with breadcrumbs and set aside until all ravioli are coated.

3.  Pour oil in a large skillet to a depth of about a half of an inch, and heat over medium heat.  In batches, fry ravioli for about a minute on each side, or until golden brown.  Drain ravioli on paper towels and sprinkle with a little parmesan cheese, if desired.

4.  Serve with some warm marinara sauce for dipping.

Tuesday, December 8, 2009

Hot Crab Dip


It's taken me a little bit to get these next few recipes posted because I've been way too obsessed with reading the Twilight Saga over the past few days, but we had Kevin's parents over for dinner last weekend, and I must say it turned out really good!  I wanted to try a few recipes that I thought would be "company worthy," and I'm happy to say that the recipes from this dinner are definitely keepers :)  To start out with, I made a hot crab dip for an appetizer.  I hate it when I try a crab dip and it has that canned crab fishy taste, so I decided to get a couple of king crab legs to use in this dip.  King crab is my favorite because it's so sweet and doesn't taste "fishy" at all, and it tasted really good in this dip.  I used this recipe from http://www.allrecipes.com/.  This is a good appetizer for company because you can prepare the dip in the morning and then pop it in the oven right before you company is arriving.

Ingredients:

1 (8 ounce) package cream cheese, softened
1/2 cup sour cream
2 tablespoons mayonnaise
1 1/2 tablespoons lemon juice
zest of 1 lemon
2 teaspoons Worcestershire sauce
1 teaspoon dry mustard
garlic powder to taste (I used about a teaspoon)
1 cup shredded Cheddar cheese
3/4 pound fresh crabmeat (I used king crab - don't use canned!)
3 dashes hot sauce
Old Bay Seasoning to taste (I probably used about a tablespoon or maybe a little more)
crackers or toasted bread to serve

Directions:

1.Preheat oven to 325 degrees F (165 degrees C). Lightly grease a 1 quart baking dish.

2.In a medium bowl, mix cream cheese, sour cream, mayonnaise, lemon juice and zest, Worcestershire sauce, dry mustard, garlic powder and cheddar cheese. Fold in crabmeat, hot sauce and Old Bay seasoning to taste.

3.Transfer the mixture to the prepared baking dish. Bake in the preheated oven 30 minutes, or until bubbly.  Serve the dip with toasted bread or crackers.

Thursday, December 3, 2009

Mussels Mariniere


Ever since my mom and I made Cioppino about a month ago, I've been wanting to do something similiar but just with mussels.  That broth was just soooo good that I thought it would be a good weeknight meal to do with just mussels so that I don't have to buy a ton of different seafood.  For some reason my grocery store hasn't been carrying mussels lately.....I asked the seafood guy and he said they've been having trouble with all of their mussel orders coming in because half of them are already dead by the time they get there.  I decided that I would have to make a run to Whole Foods.  I think Whole Foods has some amazing stuff, but it's just too expensive to do too much shopping there.  I ended up getting some really good mussels, but they cost more than double what my grocery store usually charges for them.....oh well, this dish was worth it! 

Trust me, if you like mussels you will love this :)  Make sure you have plenty of thick sliced bread to soak up all of the broth because the flavor is so good.  In terms of how many mussels you will need, I read somewhere that if you're serving mussels as the main course to plan for 1 lb per person, and if you're doing mussels for appetizers you should plan for 1/2 lb per person.  This time I made 2 lbs (although the seafood guy told me he threw in a few extra) and it was just a little more than we could eat.  Since mussels won't stay as leftovers, I may just get a pound and a half for the two of us next time....but then again sometimes it's good to play it safe with mussels in case you have to throw a bunch out (I hardly had to throw any out on this batch).  Enjoy!

Ingredients:

1 green bell pepper, finely diced
1 cup shallots, diced
1 bunch scallions, chopped
3 tablespoons minced garlic
salt, pepper, and italian seasoning to taste
3 cans italian flavored diced tomatoes
1 can beef broth
1 jar of clam juice
1 cup white wine (we used a Savignon Blanc)
2 lbs mussels, scrubbed and debearded (buy them the same day you're going to cook them)
Crusty bread to serve with your mussels

Directions:

Sautee onions, green peppers, shallots, scallions, and garlic until translucent. Season to taste with salt, pepper, and italian seasoning (be generous with your seasoning). Add the white wine and let cook down a bit.

In a large stockpot, heat up italian diced tomatoes, beef broth, and claim juice.  Transfer the sauteed onion and pepper mix to the stockpot and heat over medium heat for about 30 minutes or so. At this time taste the broth and season as needed.
Meanwhile, soak the mussels in cold water for about 20 minutes to remove any sand or dirt.  Throw out any mussels that don't close when you tap their shell.  

Add the mussels to the pot and cook until the shells open (about 10 minutes).  Discard any mussels that don't open and serve the mussels and broth w/ crusty bread.

Sunday, November 29, 2009

Coconut Shrimp


This is my last post from my thanksgiving feast :)  About a month ago, my parents made this recipe and recommended it to me so I decided it would be a good thanksgiving appetizer to make.  This recipe is from The Neely's, and it's really good!  The dipping sauce really makes this recipe so definitely make it along with the shrimp.  My grocery store had colossal shrimp on sale this week, and I think this recipe works best with the really big shrimp so that you don't have to do the breading process on way too many shrimp since it can be a little time consuming.  I will only be using this recipe from now on whenever I make coconut shrimp.

Ingredients:

Shrimp-
Peanut oil, for frying
1 1/2 pounds jumbo shrimp, peeled and deveined
1 cup panko bread crumbs
1 1/2 cups shredded sweetened coconut
4 large eggs
Salt and freshly ground black pepper
1 cup all-purpose flour
1/2 tablespoon onion powder
1/2 tablespoon granulated garlic powder

Zesty Dipping Sauce-
1 (6-ounce) jar orange marmalade
1/4 cup sweet Asian chili sauce
1 lime, juiced

Directions:

Make your dipping sauce just by mixing the ingredients together in a small bowl, and store it in the refrigerator until you're ready to eat.

Preheat oil in a deep-fryer to 350 degrees F (I decided to just pan-fry these so I heated a little oil in a large skillet over medium high heat).

Butterfly shrimp and set aside.

In medium bowl mix together panko and coconut (I first put the coconut in the food processor and pulsed a few times to get the flakes a little smaller so that they would stick better to the shrimp). In another medium bowl beat eggs and dash of salt and pepper. In a third bowl mix flour, onion and garlic powder together. Dredge shrimp in flour, then eggs, then the bread crumbs.

Place in preheated deep-fryer (or in my case, a large skillet) and fry, in batches, until crisp and golden brown; 2 to 3 minutes (my shrimp were huge so they needed 3-5 minutes, but be careful not to overcook the shrimp). Drain on a paper towel-lined sheet tray. Serve hot with Zesty Dipping Sauce on the side.

Baked Brie


Cheese is one of my favorite foods, so I knew I needed some type of cheesy appetizer to add to our thanksgiving menu.  I decided to do baked brie served with crackers, green apples, and red grapes because I thought that would be really yummy and make my platter look nice and colorful.  This is an easy basic appetizer that is super quick to make and looks really pretty.

Ingredients:

1 sheet of frozen puff pastry, thawed (I buy the frozen pepperidge farm puff pastry sheets)
1 wheel of brie cheese (I think I used an 8 oz. wheel)
1 egg, whisked
Dippers to serve with the brie (such as crackers, apples, and grapes)

Directions:

Preheat the oven to 350 degrees and grease a baking dish (I use a pie pan).

At this time, I like to cut the rind off the brie because I really don't like the weird flavor of the rind.  This is a personal preference and it is easier to leave the rind on, but I always cut it off.

Wrap the puff pastry sheet around the wheel of brie and place it in the baking dish with the seam side down.  Brush the top and sides of the pastry with an egg and bake until golden brown (about 20-25 minutes).

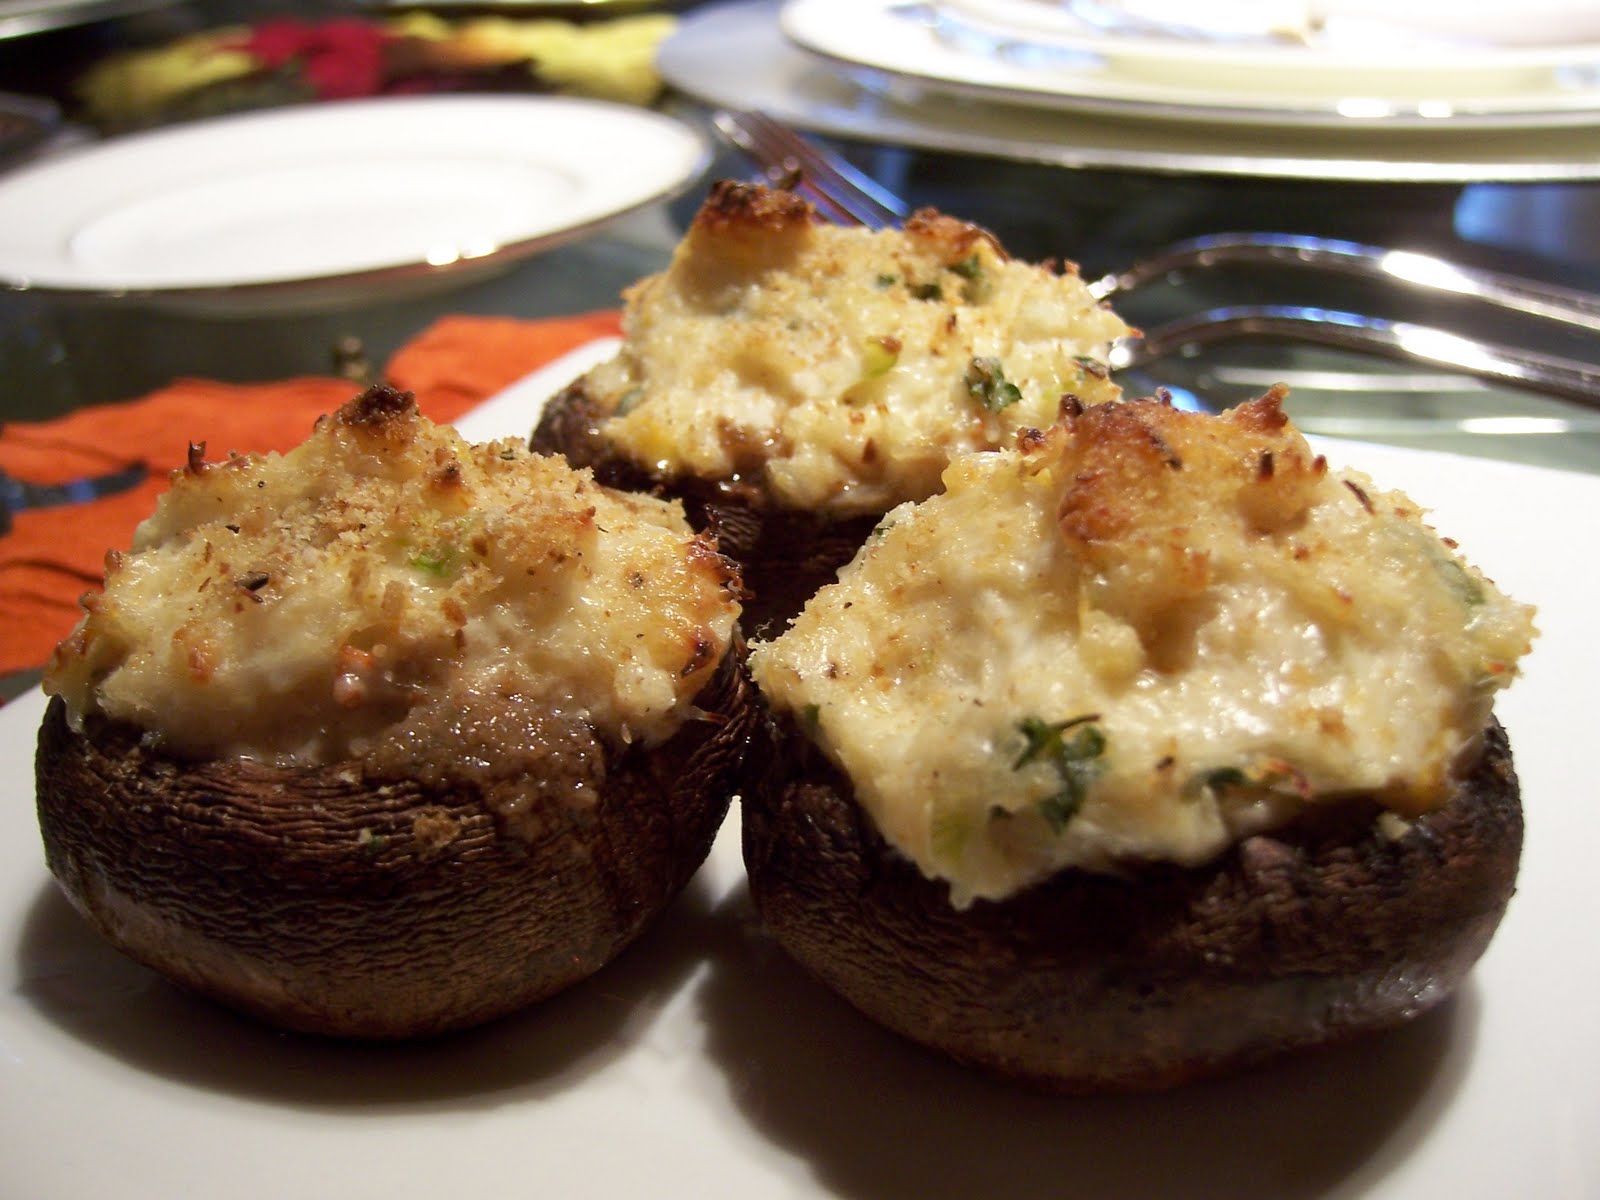
Crab Stuffed Mushrooms


This year, my sister wanted to bring an appetizer for Thanksgiving dinner.  I don't want her to get mad for me saying this (because she reads this blog), but a couple of years ago, Kristen brought an appetizer to some dinner we had and it tasted not so good....actually it was pretty bad.....BUT....she totally redeemed her appetizer making skills with this one.  Even though I'm not a huge mushroom fan, I was totally impressed with this dish!  It's a great little appetizer to bring to a party because you can make it ahead of time, and just stick it in the oven whenever you are ready to bake it.  The crab filling had a really good flavor.  She used this recipe from Paula Deen and changed it just a little bit.

Ingredients:

1 cup crabmeat (she bought fresh crab and steamed it and used about 1 1/2 cups)
1/2 cup cream cheese
1/2 cup fresh parsley leaves, chopped
1/2 cup green onions, chopped
4 tablespoons Parmesan
zest of 1 lemon
1/2 cup shredded cheddar cheese
salt, pepper, and garlic powder to taste
2 portobello mushroom caps, or 10 white mushrooms caps (I think she used maybe 12-15 baby portobellos)
1/2 cup bread crumbs
Nonstick cooking spray

Directions:

Preheat the oven to 375 degrees F.

Combine the crabmeat, cream cheese, parsley, green onions, shredded cheddar, lemon zest, and Parmesan. Season with salt, pepper, and garlic powder to taste. Stuff the mushroom caps with the mixture and top with bread crumbs. Spray the tops with nonstick spray to help them brown. Transfer to the oven and bake for about 20-25 minutes, or until the filling is hot and melted.

Thanks Kristen!  What a great thanksgiving appetizer :)

Wednesday, November 18, 2009

Guacamole


Chips and guacamole made the perfect appetizer / side dish for the enchiladas I made tonight.  I love avocados, and this guacamole turned out really good and flavorful.  I used to buy that store bought guacamole because I would never plan ahead and buy avocados a few days in advance so that they had time to ripen, but I will never buy packaged guac again because the homemade stuff is easy to make and so much better!  Plus, I plan all of my meals out so that I only have to go to the grocery store once a week so by planning to have this meal on a Tuesday, they avocados had time to ripen since I bought them on Sunday.  During the day on Tuesday, I put the avocados in a brown paper bag just to accelerate the ripening.  This recipe came from http://www.allrecipes.com/

Ingredients:

3 avocados - peeled, pitted, and mashed
1 lime, juiced
1 teaspoon salt
1/2 cup diced onion
3 tablespoons chopped fresh cilantro
2 roma (plum) tomatoes, diced
1 teaspoon minced garlic
1 pinch ground cayenne pepper (optional)

Directions:

In a medium bowl, mash together the avocados, lime juice, and salt. Mix in onion, cilantro, tomatoes, and garlic. Stir in cayenne pepper. Refrigerate 1 hour for best flavor, or serve immediately (when storing, put plastic wrap directly on top of the guacamole so that there's no space between the plastic wrap and the guacamole - that way it doesn't get brown).

Tuesday, October 27, 2009

Sausage & Cheese Platter


So this isn't a recipe, but I just love making cheese and sausage platters! They're so easy to put together and are always a hit at parties or at home. I mean, who doesn't like sausage and cheese? For lunch on Sunday, I pulled some homemade summer sausage that my dad made out of the freezer and paired that with some crackers and aged cheddar cheese. We're thinking about getting a smoker next summer, and if we do I will definitely have to get the recipe for this summer sausage from my dad because it's sooooo good.

Wednesday, October 21, 2009

Bruschetta


For dinner last night, we wanted something quick and light so I decided to make bruschetta. We love to make this in the summer since tomatoes are so flavorful then, but it's still good with tomatoes in the fall with a little extra salt and balsamic. What really makes this meal for us is the splash of balsamic. You'll want to use really good quality balsamic in this recipe. We use balsamic vinegar that has been aged for 18 years. We bought it from this great little shop in Chicago called Old Town Oils. I actually bought some olive oil and balsamic vinegar from this place for my mom and mother-in-law last Christmas. If you live in Chicago or go there for a visit, you should definitely check it out! It's a little pricey, but definitely worth it :) The only problem is once you know what really good balsamic tastes like, you'll never want the cheap stuff again!

Ingredients:

3 medium sized tomatoes, deseeded and diced
1/4 of a small red onion, diced
1 tablespoon minced garlic
2 tablespoons chopped basil
Splash of EVOO
Splash of good balsamic vinegar
Salt and pepper to taste
1 french baguette, sliced and toasted

Directions:

Just mix all ingredients together and season to taste. Let sit about an hour to let all of the flavors mix together. Serve on top of toasted baguette. We used pillsbury french loaf bread and sliced and brushed with a little melted butter. We toasted the bread under the broiler for a few minutes.

This is super fast and tastes great! Just adjust the ingredient amounts to fit your taste!

Saturday, October 10, 2009

Spinach Artichoke Dip


Sometimes when I don't want to make a big meal for dinner, we end up just snacking on one of our favorite appetizers. That's what we decided to do last night while we watched The Bucket List (pretty good movie!).

I've made this recipe several times, and I love how easy it is and how great it tastes (I think it's better than restaurant spinach and artichoke dip!). It's not the healthiest of recipes with all of the cheese, but everything in moderation :) I prefer the cheese based spinach artichoke dips instead of the ones with a mayonnaise so here's a good recipe if that is what you like too.

I found the original recipe on http://www.allrecipes.com/, but I changed it up just a tiny bit. I just noticed that half of the recipes I've posted so far have been from allrecipes, but I just love that site! When I want to try something new, it's my go to site because I love reading through all the reviews, and I only made recipes that are rated 4 1/2 or 5 stars and have pictures. Anyways, here's the recipe. I usually add extra salt and pepper to most recipes, but I don't add any salt at all to this recipe because the alfredo sauce is already very salty.

Ingredients:

4 teaspoons garlic
1 (10 ounce) package frozen chopped spinach, thawed and drained
1 (14 ounce) can artichoke hearts, drained and chopped (I added a little less than this)
1 (10 ounce) container Alfredo-style pasta sauce (I used the alfredo found in the refridgerated section)
1 cup shredded mozzarella cheese
1/3 cup grated Parmesan cheese
1 (8 ounce) package cream cheese, softened

Directions:

1. Preheat oven to 350 degrees F (175 degrees C).
2. Stir together all ingredients and spread in an 8x8 baking dish.
3. Cover with foil and bake in the preheated oven 30 minutes, or until cheeses are melted and bubbly. Serve warm. (I made mine ahead of time and put in the refridgerator until dinner time so I baked the dip covered for 30 minutes, then uncovered and baked for another 15 minutes.)

Delicious!

Wednesday, October 7, 2009

Baked Goat Cheese


When I was growing up, I was pretty picky and didn't like to try new things so goat cheese wasn't on my list of food that I liked (well I never actually tried it but I convinced myself that it wouldn't be something I would like). Everything changed when I moved to Chicago 5 years ago! I would say that now I love to try new things and there isn't a lot that I don't like :)

Anyways, I first tried baked goat cheese at a tapas restaurant here in Chicago called Cafe Ba Ba Reeba. I loved it and still get it every time I go there, and it's such a simple (and delicious) dish that I started making it at home about a year ago. Here's how I make it:

Ingredients:

Goat Cheese (I use a little 5 oz package for my husband and I but you can adjust the amount)
Marinara Sauce (I used about a cup of this recipe from Giada, but I have also made it with store bought sauce and it still turned out great)
2 teaspoons Minced Garlic
Drizzle of EVOO
Fresh Cracked Black Pepper
1 package pillsbury refridgerated french loaf (or you could use any french baguette)

Directions:

1. Preheat the oven to 350 degrees.
2. Divide goat cheese into 4 balls (or more depending on how much goat cheese you have)
3. Put goat cheese in a small shallow baking dish and pour in your marinara sauce. Use enough marinara to surround the goat cheese, but make sure you don't cover the top of it. I used about a cup in my dish but you may need more or less depending on the size of your baking dish.
4. Add the minced garlic around the goat cheese, drizzle with a little EVOO, and add a little fresh cracked pepper on top.
5. Bake for 25 - 30 minutes, and bake the french loaf bread at the same time.
6. Once I take it out of the oven, I let it sit for about 5 minutes while I slice the bread. I also brush a little melted butter on the bread and stick under the broiler for a couple minutes, then you're ready to eat!

Just spread some of the goat cheese and marinara on your bread slices and you have a delicious dish! This is great as an appetizer, or I use this for an easy weeknight meal for my husband and I.